After
completing the basic complex and its major features, I went back to
add missing details to flesh out areas to make them a bit more
realistic (in so much as was possible) and accurate.
|
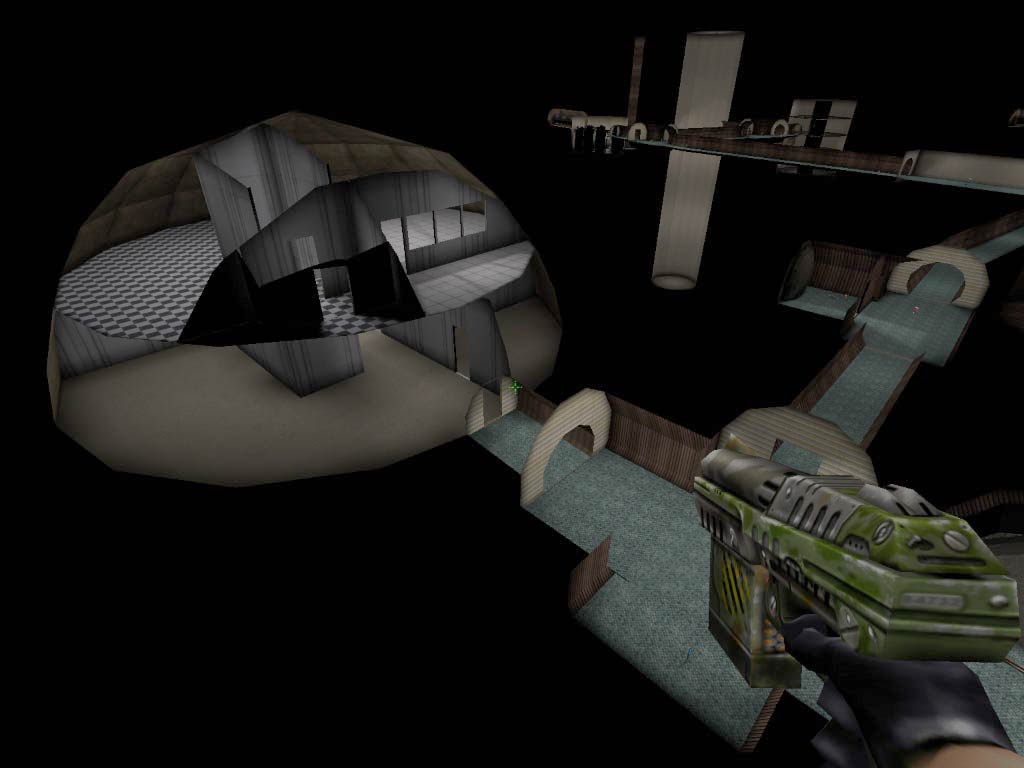
Cutaway
showing the power house without the pipe trenches and a few other
details being held at gun point!
|
One
of the first areas I returned to for further development was the power
house. It was just an empty dome with no mezzanine level and
didn't look like much.
I
added the mezzanine level,
support columns and the office, latrine and work shop. Next I
put the pipe trenches and their steel gratings in and the vibration
damping pad for the massive ice banks. I added stairs to the
mezzanine and the railings last.
|
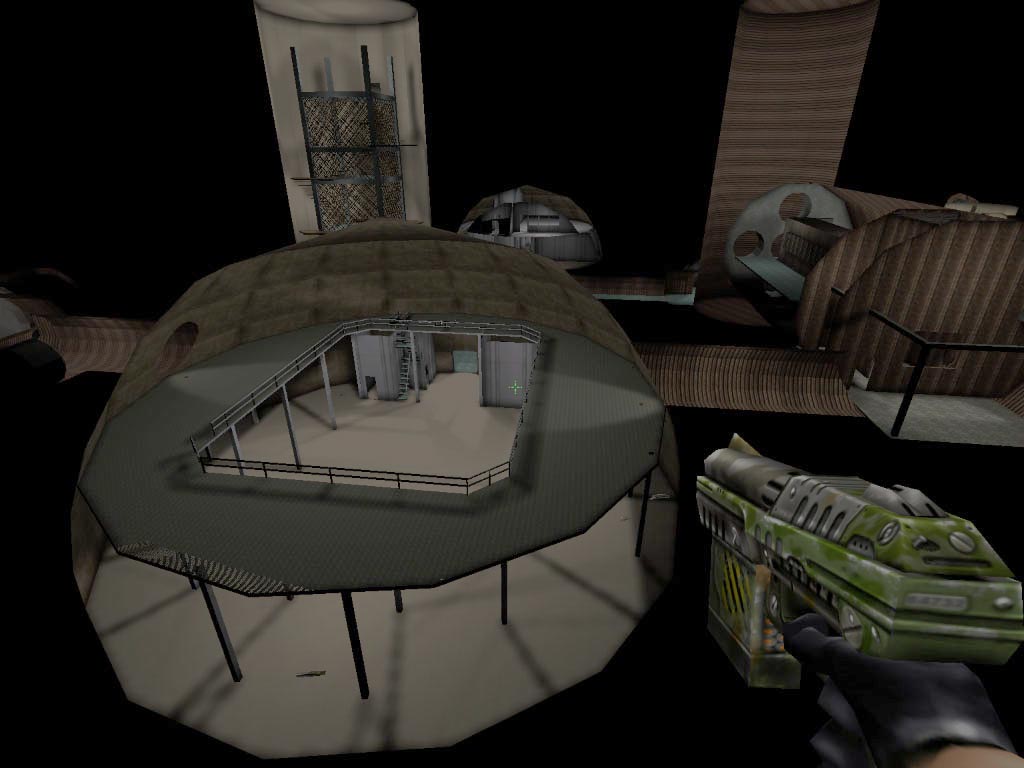
The
final look of the power house from above with the mezzanine in
place. Still rather barren but looking much better with some added
details.
|
I
wanted to add the generators but there were no good textures to
approximate their appearance. I had planned to just put in their
rough shape but it never got accomplished.
|
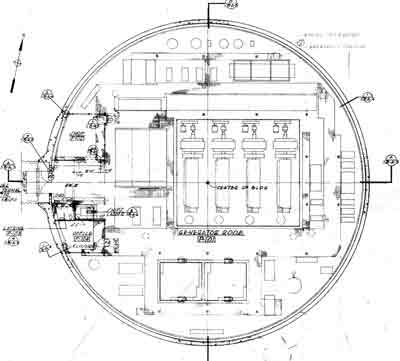
Blueprint
view without the mezzanine included.
|
|

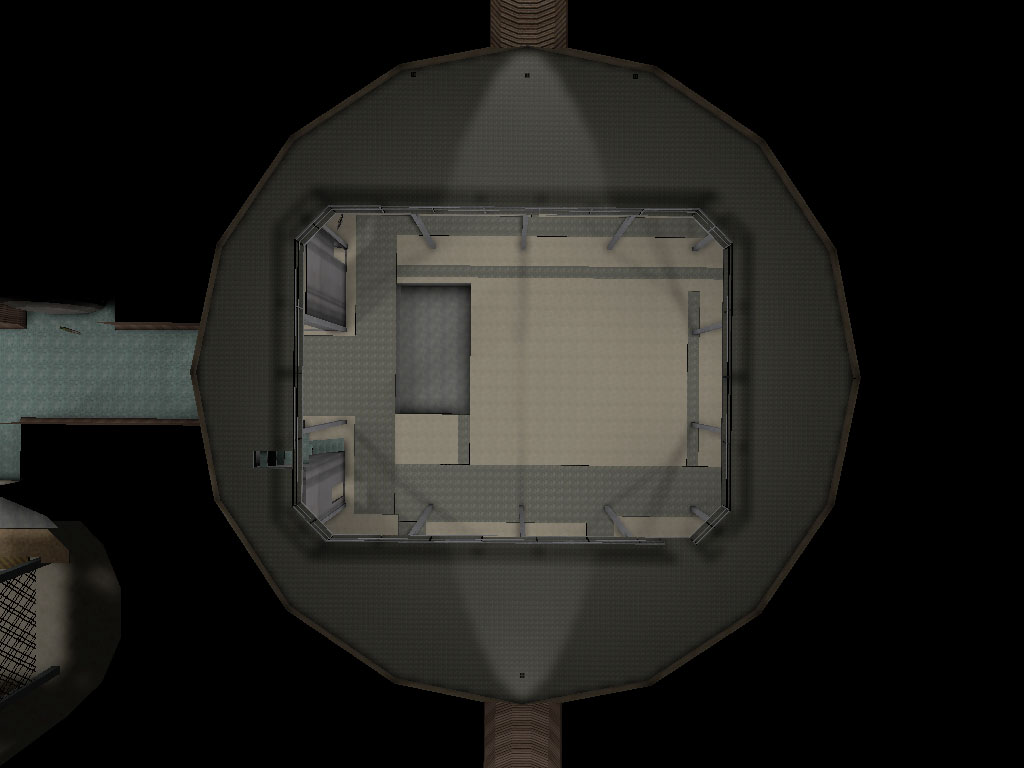
One
last cutaway view of the completed power house showing added details and
both levels.
|
I
went on to add details to the control center and entry portal, adding
a working freight elevator and doors and even sounds for the doors
opening and the elevator moving.
|
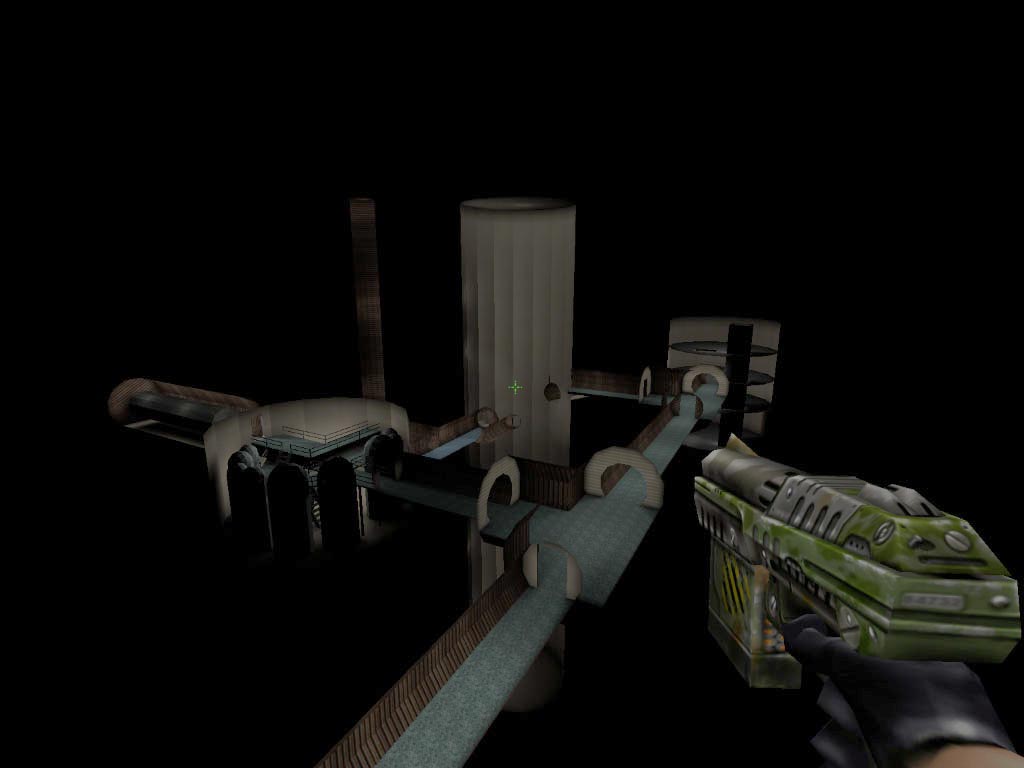
View
showing the control center relative to the other parts of the
complex. Note the absence of the antenna tunnel which would be
running toward the lower left corner.
|
|

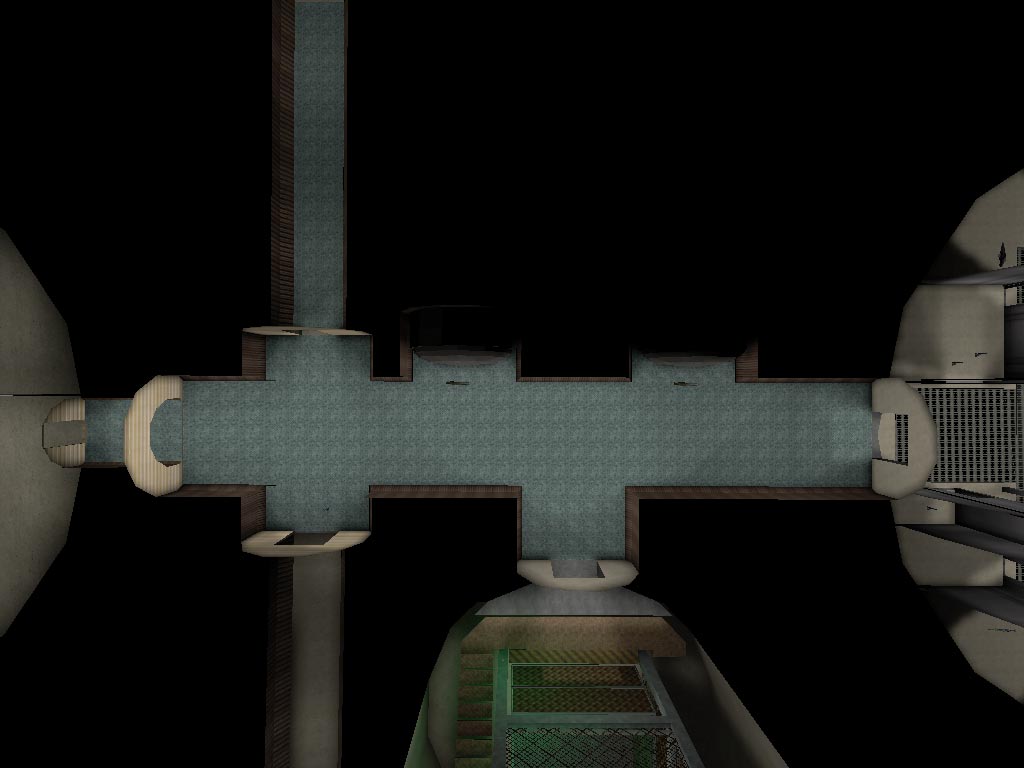
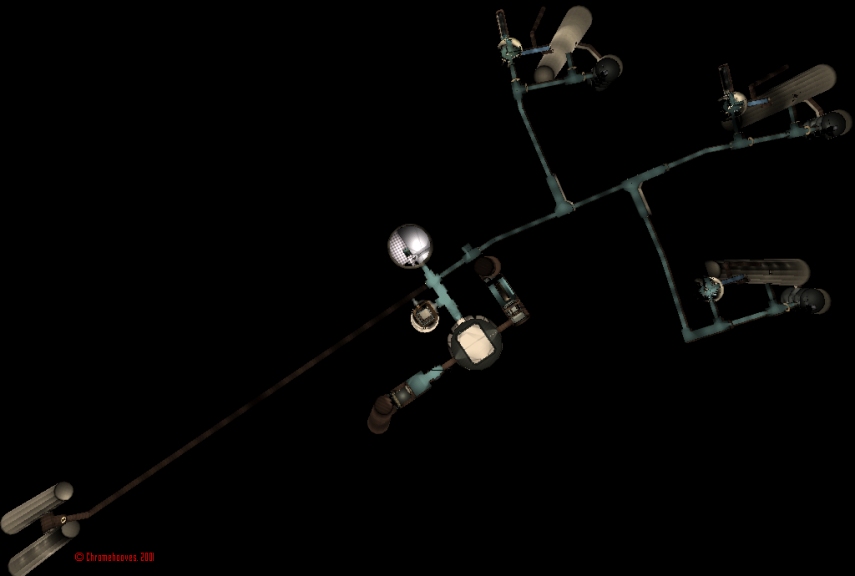
Looking
toward the launchers from above the main tunnel junction.
|
|

View
from a different angle to show detail.
|
|
View
of one of the completed launcher areas to show relative position and
detail. Note the mysterious LOX bay on the left. This is
just about the only way to ever see one-- that is, virtually, since they
were all ripped out early on to remove the valuable multi-walled
stainless steel LOX tanks.
|
|
Overhead
view of the completed main tunnel junction for comparison.
|
|

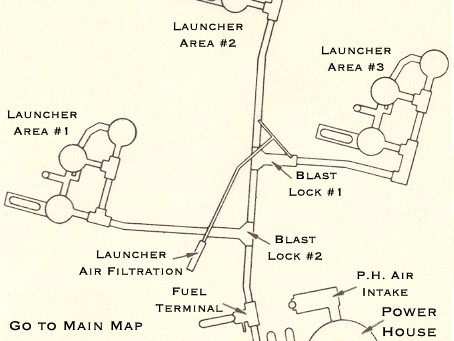
Blueprint
of the above main tunnel junction (T.J.#10) showing some of the inaccuracies
of my work along with how close other portions turned out. Good
enough for government work!
|
|

The
interior of the functional freight elevator car in the entry
portal. I added the eerie green light out of personal
preference. Turns out there were 2 of these light fixtures instead
of 1, but the design here is very close to the real fixture.
|
I
spent a lot of time making the portal elevator and the elevators
in the 3 equipment terminals work. The portal elevator was
fairly simple until I tried to add opening doors at the bottom.
I never put in doors at the top so its rather a hazard, but I put in
call buttons at the top and bottom and floor buttons.
|
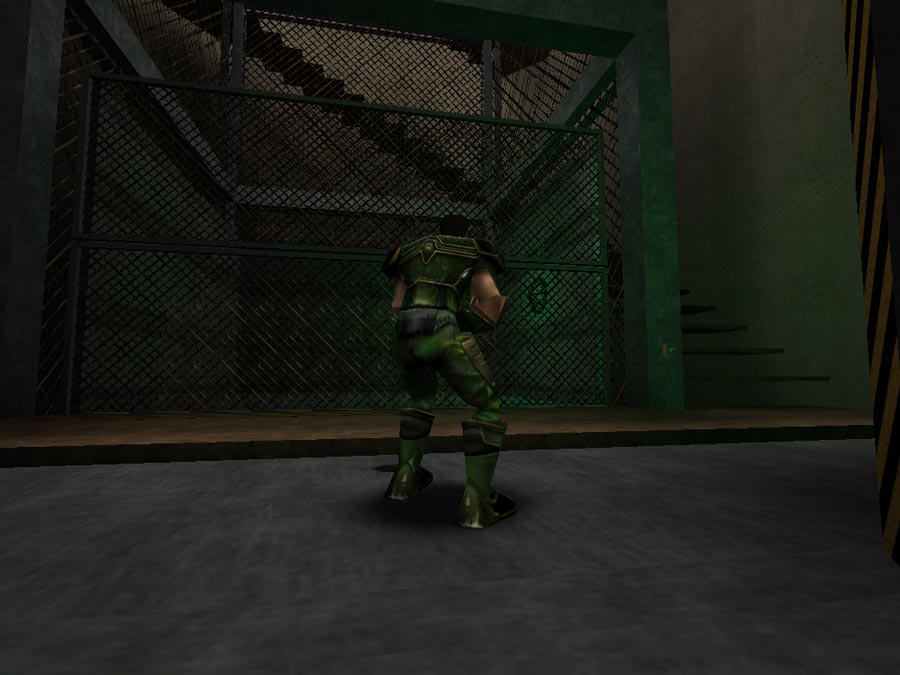
An
Unreal soldier badass waiting for the freight elevator to arrive.
Note the small call button on the beam to the right of the doors.
When you approached the elevator, the doors would open
automatically. The entry portal it turns out would be my biggest
mistake in terms of scale. The portal, elevator and stairs were
all way too big and tall!
The
real elevator was perhaps about 10' to 12' square whereas mine gave the
impression of being about 20' square. Oops...
As
for the stairs, the rise was so high that the little marines (depicted
above) had to jump to ascend them. Oops again...
|
The
elevators in the equipment terminals were much more complicated
because there needed to be a call button for each floor and 4 buttons
in the elevator so that took longer to set up, but the results worked
really well.
|
An
overhead view of the entire completed complex model.
|
The
model was just a diversion that I included here for those
interested. It was fun although time-consuming. I hope it
will be enjoyed.
Now
for what I think is the best part; here are 3 videos I captured as I
moved about the model. There is no sound and the video quality
is not great unfortunately, but I think the videos are still really
cool and show off the work quite well. This is as close as I can
hope to get you to being able to see the inside of a Titan I without
real video.
In
the future, I hope to add some video taken by a friend of 724-C, but
for now, this is as close as most folks can get to visiting a Titan
I. These files are a bit large and so depending on your
connection speed may take a while to download.
Please
do not post these videos to any online communities such as Myspace or
YouTube or similar sites. I don't mind sharing them but I would
prefer they were not altered or hosted elsewhere to the benefit of
some corporation. These files are copyrighted and owned by
myself. Thank you.
Enjoy!
Right
click on the filename and choose the appropriate option to save the
file to your pc.
Go
to the Main Map or choose
a new area to explore on the map below:
Current
Location: Titan I 3D Model Part 3
|
Where
would you like to go next?
|

|
Contact
| Site Map | Links |
Hosted by
InfoBunker